1
Open Build mode
Use the left navigation in Google AI Studio, then choose Android in the platform picker.
Build mode → Android
A simple mental picture of the picker. Verify in Google’s guide ↗
Google AI Studio can generate a native Android project from a plain-language prompt. This is the path: ask clearly, inspect what it made, then put it on a device.
AI Studio removes some setup, not the need to understand what is happening. Follow these three moves in order.
Officially, Build mode starts from a prompt and lets you select Android from the platform picker. AI Studio generates Kotlin and Jetpack Compose, then opens a browser-based emulator.
Use the left navigation in Google AI Studio, then choose Android in the platform picker.
Describe one useful screen and one interaction. Ask for explanations, not magic.
Open the Code tab. Look for Kotlin files, Compose UI, resources, and Gradle build files.
Ask for one change at a time. When you want local control, download the project as a ZIP and open it in Android Studio.
Copy this, then replace the bracketed idea. The student still decides what the app should do and reviews every change.
Build a native Android app in Kotlin and Jetpack Compose called [NAME]. Start with one screen: [WHAT THE USER SEES]. Add one button that [WHAT HAPPENS WHEN TAPPED]. Keep the design simple, use local state only, and explain which files you changed.Use the generated app as a starting point, not as proof that everything is correct.
There are three useful levels. Start with the browser preview, then choose a local virtual device or a real phone when you need real hardware behavior.
AI Studio’s Android emulator runs in the cloud and streams to your browser. Great for the first “it works!” moment.
For Google AI Studio’s browser install, use Chrome or Edge, a USB cable, Developer options, and USB debugging.
Android Studio’s Device Manager creates an Android Virtual Device (AVD), a pretend phone that runs on your computer. You create it once — the system image is what gets downloaded the first time you pick it.
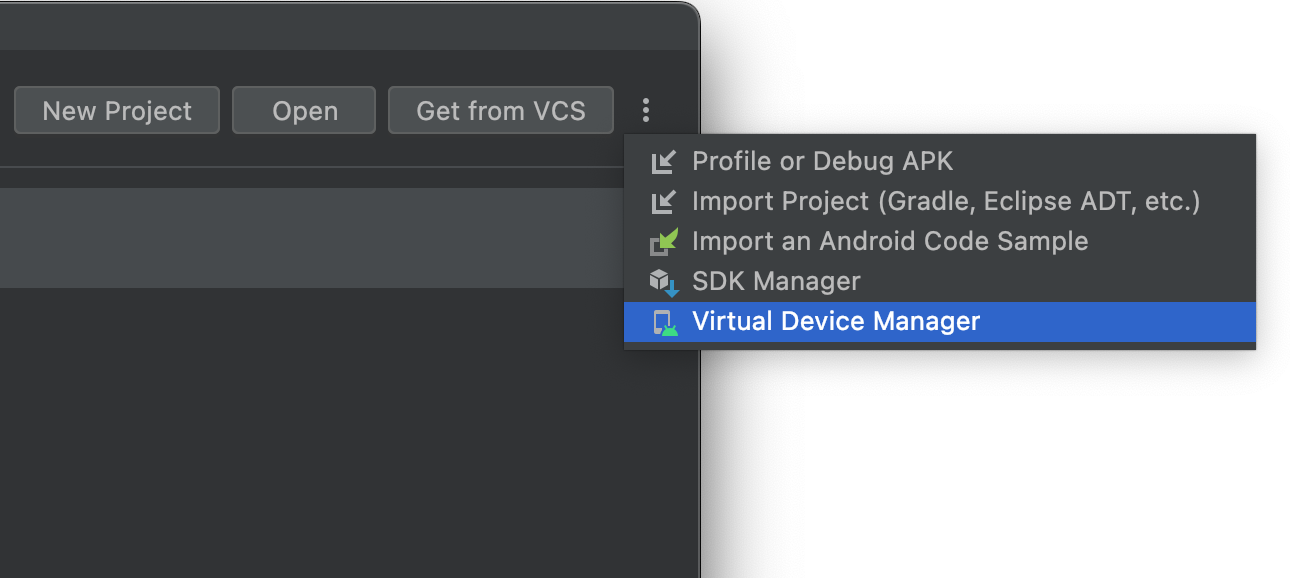
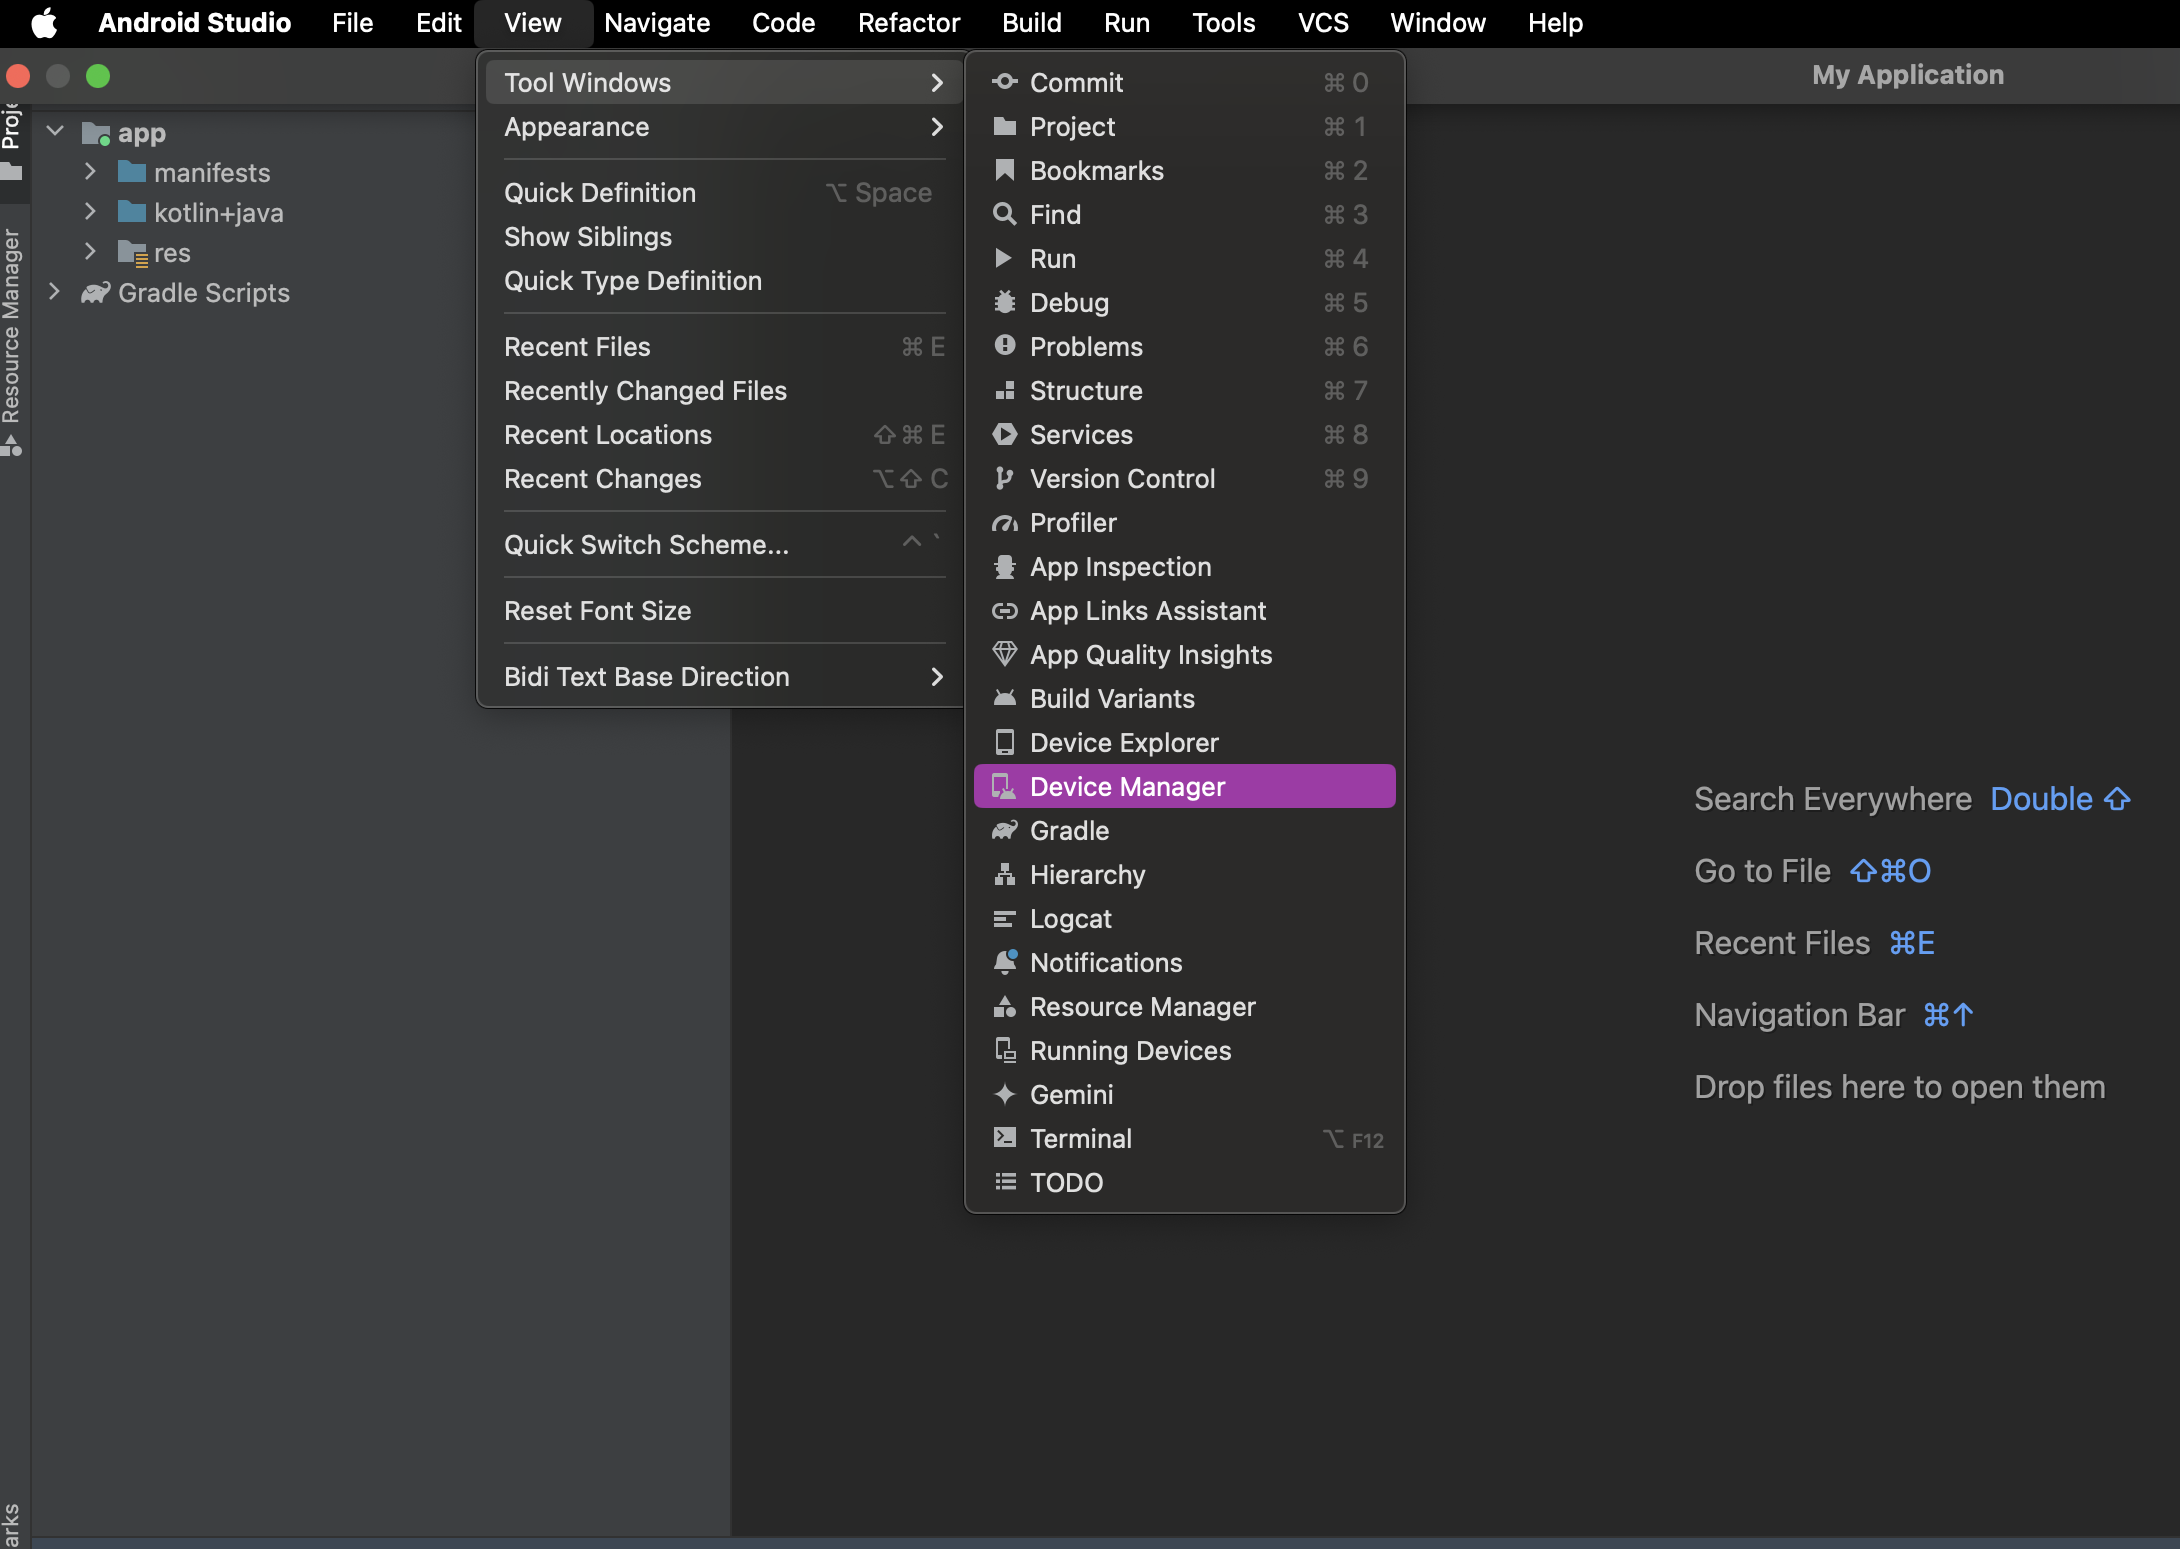
From the Welcome screen use More Actions → Virtual Device Manager. In a project use View → Tool Windows → Device Manager.
Click +, choose Create Virtual Device, then select a phone profile such as a Pixel device.
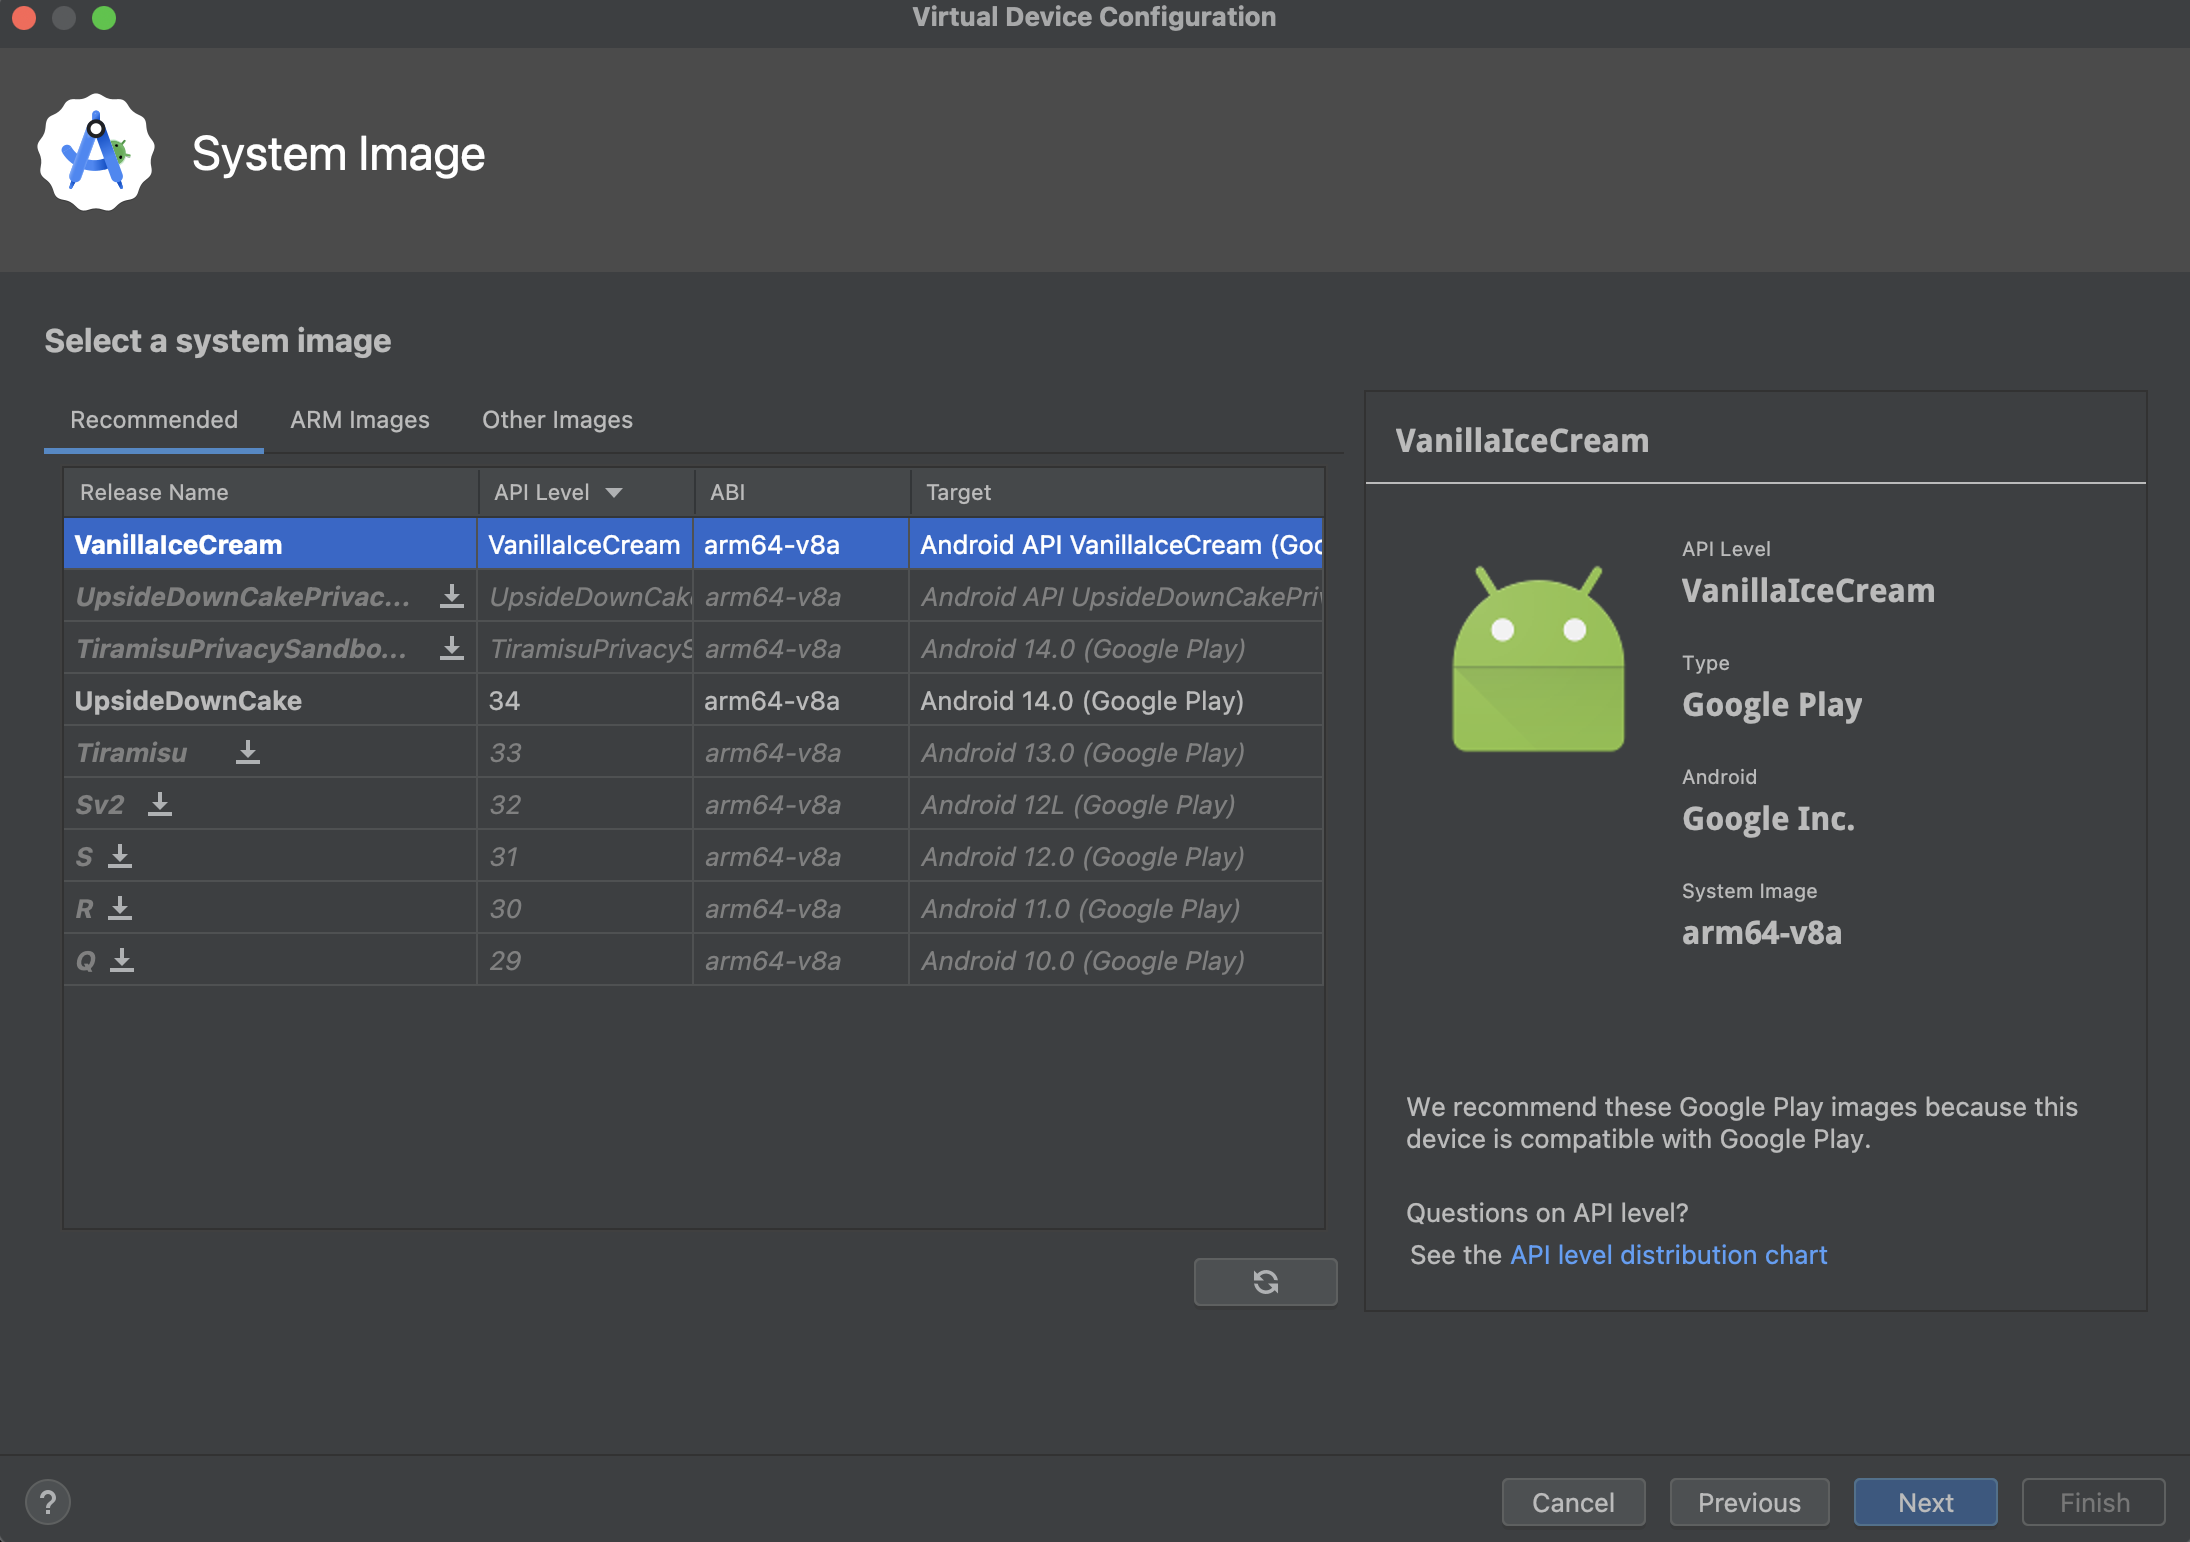
Pick a recommended API image. A download icon means it is not on the computer yet; click it and wait.
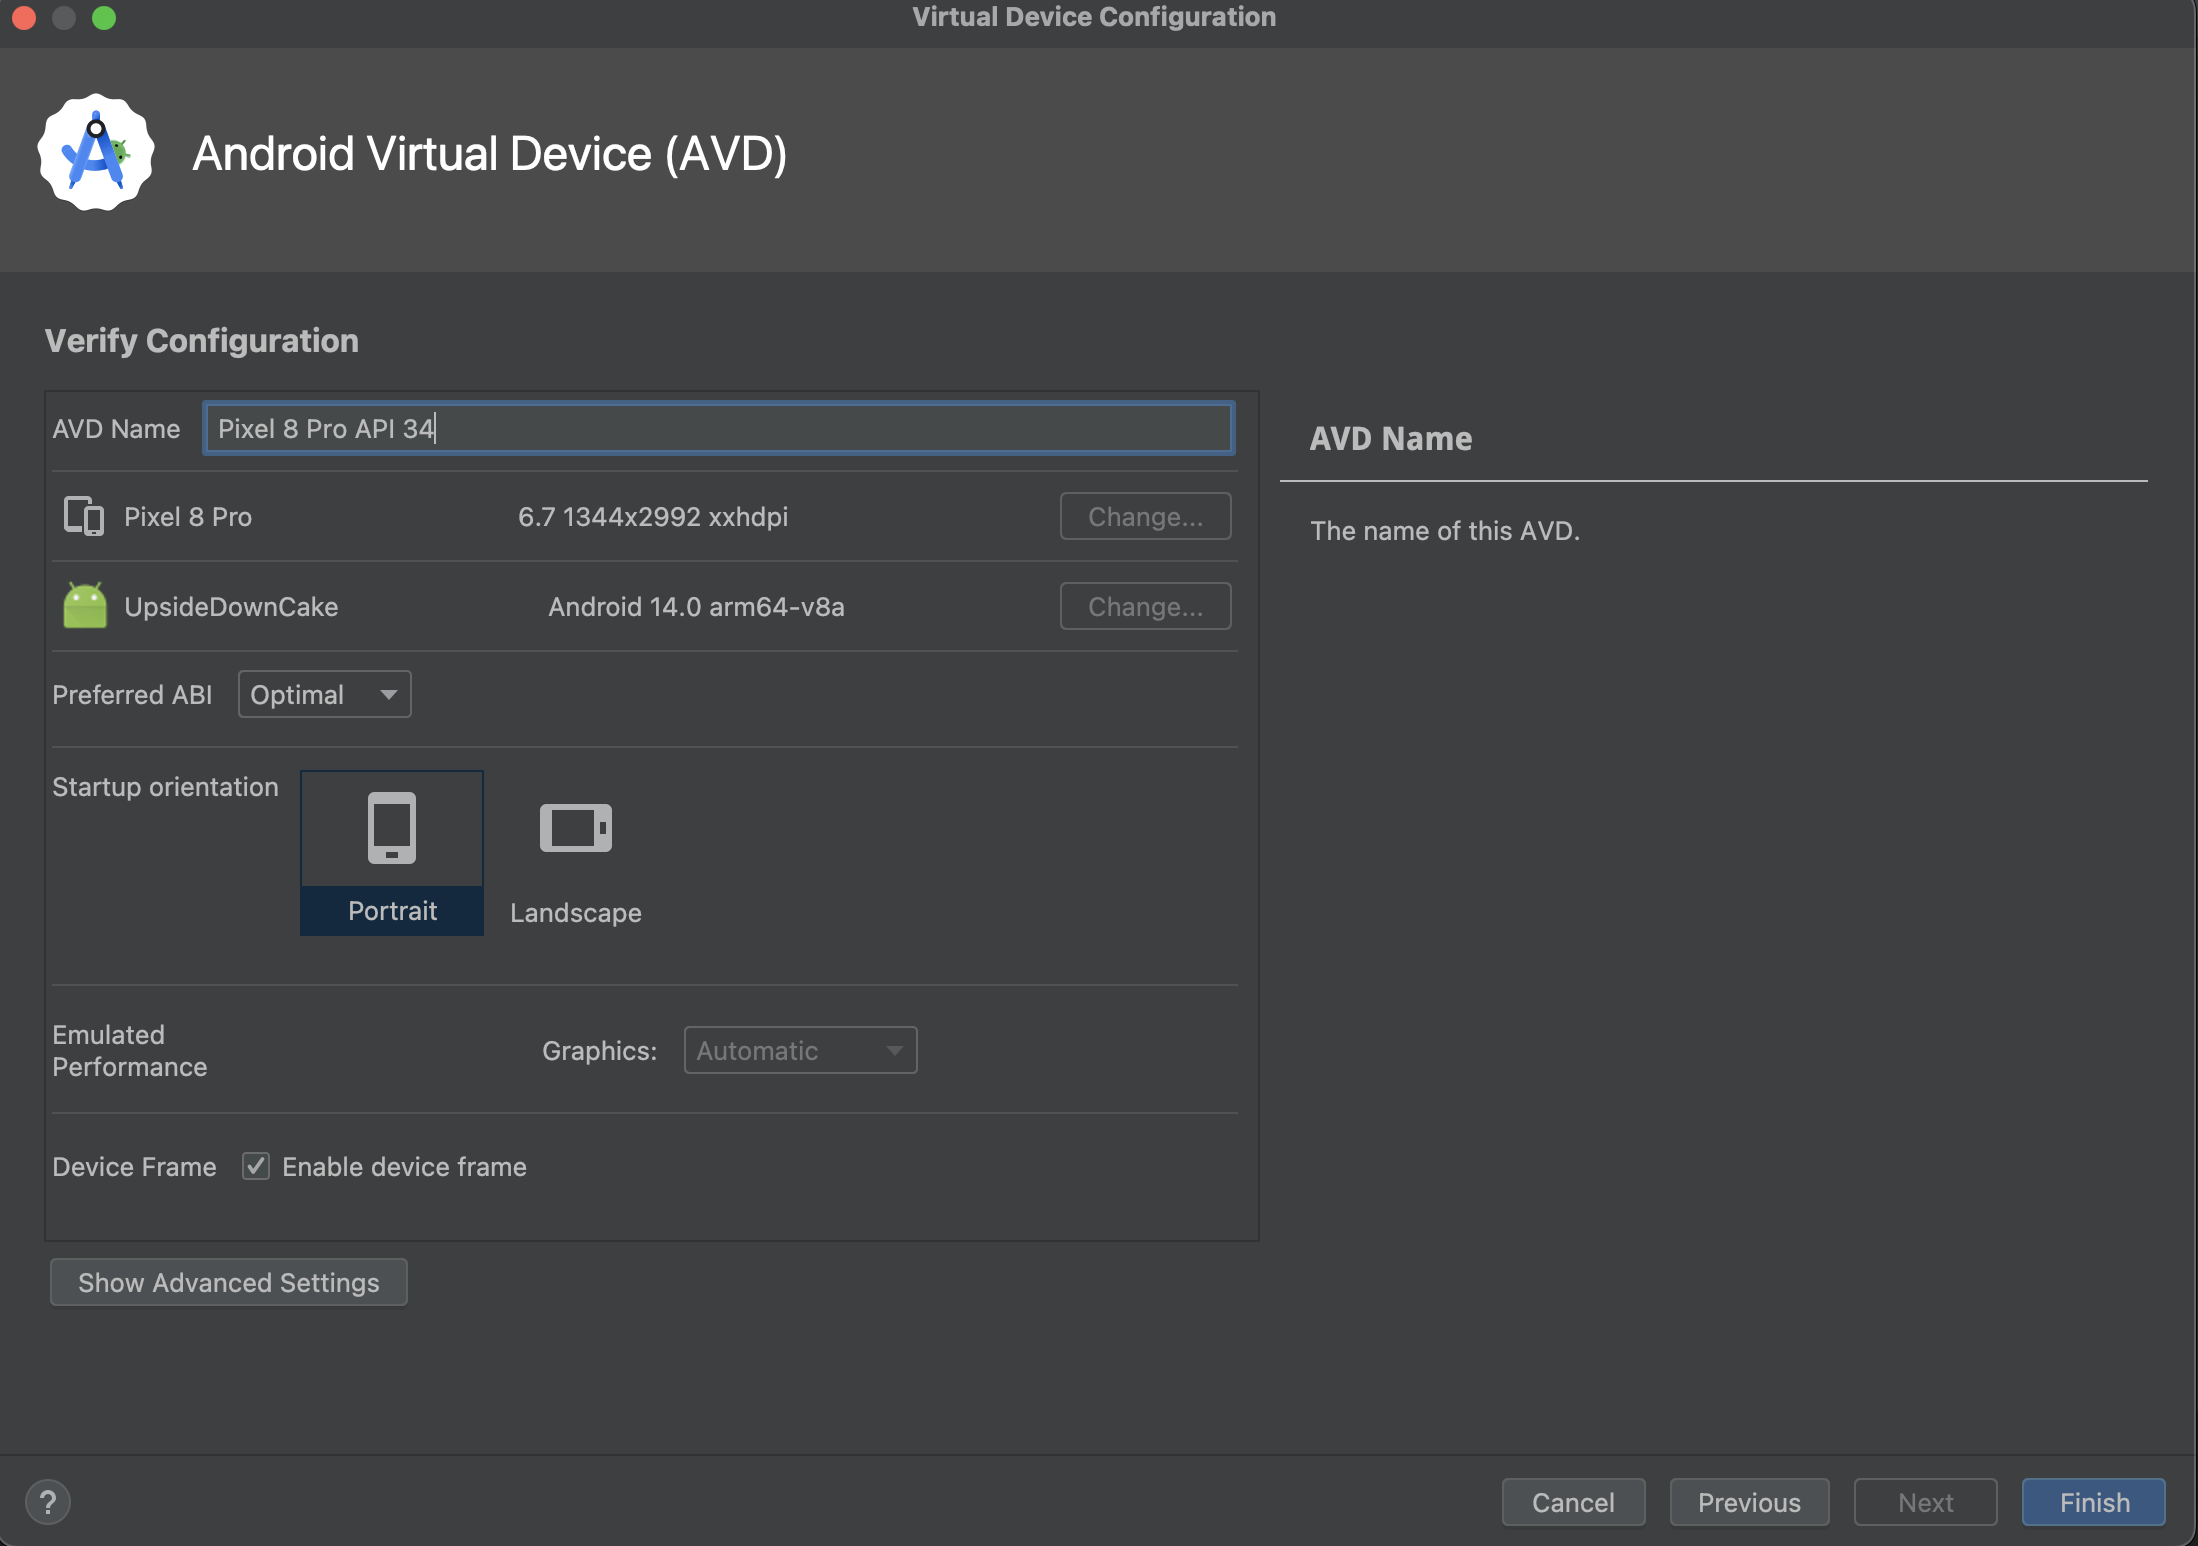
Accept the configuration, click Finish, then press the play button beside the new device. Select it in Android Studio’s run menu.
AI Studio’s Android path is powerful but has boundaries. If a student asks for these, they’ll hit a wall — steer them toward Route A (hand-built in Android Studio) instead.
AI Studio generates Kotlin with Jetpack Compose. It does not support Java or XML layouts.
Only single-activity, single-module projects. No complex multi-screen architectures.
C and C++ (NDK) are not supported, and neither are Wear OS, Android TV, or Automotive targets.
No built-in backend, database, or multiplayer. Those need the web/full-stack path or Route A.
The goal is not to accept the first generated answer. The goal is to build a repeatable loop: prompt, inspect, run, notice, improve.